


Introduction to PCB Soldering
PCB soldering is the process of joining electronic components to a printed circuit board (PCB) using a molten metal alloy called solder. It is a crucial skill for anyone involved in electronics manufacturing, repair, or hobby projects. This comprehensive guide will cover everything you need to know about PCB soldering, from the basics to advanced techniques and troubleshooting.
What is PCB Soldering?
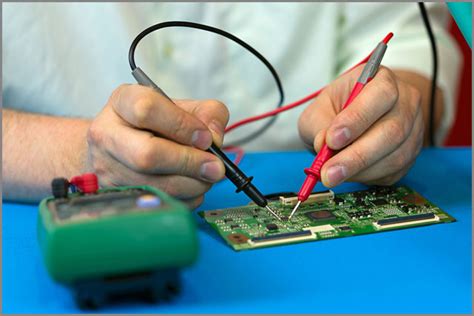
PCB soldering is a method of creating electrical connections between electronic components and the conductive traces on a PCB. The process involves applying heat to the joint area and melting a small amount of solder, which forms a strong mechanical and electrical bond when cooled.
Types of Soldering
There are two main types of soldering used in PCB assembly:
- Through-hole soldering: This method involves inserting component leads through holes drilled in the PCB and soldering them on the opposite side.
- Surface-mount soldering: This technique involves soldering components directly onto the surface of the PCB without using holes.

Tools and Materials Required for PCB Soldering
To get started with PCB soldering, you’ll need the following tools and materials:
Essential Tools
| Tool | Description |
|---|---|
| Soldering iron | A heat source used to melt solder and create connections |
| Soldering iron tips | Interchangeable tips for different soldering applications |
| Solder | A metal alloy that melts to create electrical and mechanical connections |
| Solder wick | A braided copper wire used to remove excess solder |
| Flux | A chemical agent that helps solder flow and adhere to surfaces |
| Tweezers | Precision tools for handling small components |
| Wire cutters | Used for trimming component leads and wires |
Additional Tools and Accessories
- Soldering iron stand
- Tip cleaner
- Magnifying glass or microscope
- Fume extractor
- ESD-safe mat and wrist strap

Preparing for PCB Soldering
Before you begin soldering, it’s essential to set up your workspace and prepare your tools and materials properly.
Setting Up Your Workspace
- Choose a well-ventilated area with good lighting.
- Ensure your work surface is clean, stable, and heat-resistant.
- Use an ESD-safe mat and wrist strap to prevent electrostatic discharge damage to sensitive components.
Preparing Your Tools
- Select the appropriate soldering iron tip for your project.
- Clean the tip using a damp sponge or brass wool.
- Tin the tip by applying a small amount of solder to protect it from oxidation.

Basic PCB Soldering Techniques
Through-Hole Soldering
- Insert the component leads through the designated holes in the PCB.
- Bend the leads slightly to hold the component in place.
- Heat the joint area with the soldering iron and apply solder until it flows around the lead and pad.
- Remove the soldering iron and allow the joint to cool.
- Trim the excess lead with wire cutters.
Surface-Mount Soldering
- Apply a small amount of solder paste to the pads on the PCB.
- Place the surface-mount component onto the pads using tweezers.
- Heat the joint area with the soldering iron until the solder paste melts and flows around the component leads and pads.
- Remove the soldering iron and allow the joint to cool.
Advanced PCB Soldering Techniques
Drag Soldering
Drag soldering is a technique used for soldering multiple surface-mount components in a row. To perform drag soldering:
- Apply solder to one pad of each component in the row.
- Drag the soldering iron tip along the row of components, heating each joint and allowing the solder to flow around the leads and pads.
- Remove the soldering iron and allow the joints to cool.
Rework and Repair
Sometimes, you may need to rework or repair a soldered joint. To do this:
- Use a solder wick to remove the old solder from the joint.
- Clean the area with flux and reapply fresh solder if necessary.
- If removing a component, heat the joint area while gently pulling the component with tweezers.
Troubleshooting Common PCB Soldering Issues
| Issue | Cause | Solution |
|---|---|---|
| Cold joint | Insufficient heat or poor solder flow | Reheat the joint and apply fresh solder |
| Bridging | Excess solder connecting adjacent pads | Use solder wick to remove excess solder |
| Solder balls | Excess solder or contaminated flux | Use a finer soldering iron tip and clean flux residue |
| Lifted pads | Excessive heat or mechanical stress | Use a lower soldering iron temperature and avoid pulling on components |
PCB Soldering Safety Precautions
- Always wear safety glasses to protect your eyes from solder splashes and fumes.
- Work in a well-ventilated area or use a fume extractor to minimize exposure to solder fumes.
- Keep the soldering iron in its stand when not in use and avoid touching the hot tip.
- Wash your hands thoroughly after soldering to remove any lead or flux residue.
Frequently Asked Questions (FAQ)
1. What is the best solder for PCB soldering?
The best solder for PCB soldering is a lead-free alloy with a composition of 96.5% tin, 3% silver, and 0.5% copper (Sn96.5Ag3.0Cu0.5). This alloy offers good wetting properties, strength, and reliability.
2. How do I choose the right soldering iron tip for my project?
Select a soldering iron tip based on the size and type of components you’ll be soldering. Use a fine tip for small surface-mount components and a larger tip for through-hole components or larger joints.
3. Can I solder without flux?
While it is possible to solder without flux, it is not recommended. Flux helps remove oxides from the surfaces being soldered, promotes better solder flow, and results in stronger, more reliable joints.
4. How can I improve my PCB soldering skills?
Practice is the key to improving your PCB soldering skills. Start with simple projects and gradually work your way up to more complex ones. Observe experienced solderers and learn from their techniques. Additionally, invest in quality tools and materials to ensure consistent results.
5. What should I do if I accidentally damage a component while soldering?
If you accidentally damage a component while soldering, assess the extent of the damage. If the component is not critical and the damage is minor, you may be able to continue using the PCB. However, if the component is essential or the damage is severe, you may need to replace the component or start over with a new PCB.
Conclusion
PCB soldering is an essential skill for anyone involved in electronics manufacturing, repair, or hobby projects. By understanding the basics of PCB soldering, mastering advanced techniques, and following safety precautions, you can create strong, reliable electrical connections and bring your electronic projects to life. Remember to practice regularly, invest in quality tools and materials, and never stop learning to continually improve your PCB soldering skills.