


Introduction to SMT Stencils
Surface Mount Technology (SMT) has revolutionized the electronics manufacturing industry by enabling the production of smaller, faster, and more efficient electronic devices. One of the key components in the SMT assembly process is the stencil, which is used to apply Solder Paste onto the printed circuit board (PCB) pads. SMT stencils play a crucial role in ensuring the accuracy and consistency of solder paste deposition, ultimately affecting the quality and reliability of the final product.
In this comprehensive guide, we will dive deep into the world of SMT stencils, covering their types, materials, design considerations, and best practices for optimal performance.
What are SMT Stencils?
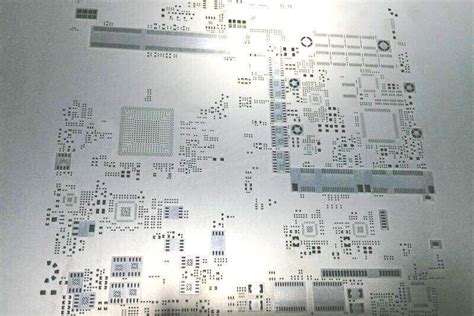
SMT stencils are thin, flat sheets of metal or other materials with precise openings that correspond to the pads on a PCB. They are used in conjunction with solder paste and a squeegee to deposit a controlled amount of solder paste onto the PCB pads. The stencil acts as a template, ensuring that the solder paste is applied only where it is needed, in the correct quantity, and with the desired shape.
Key Functions of SMT Stencils
- Solder Paste Deposition: SMT stencils enable the precise application of solder paste onto PCB pads, ensuring the right amount of solder is used for each component.
- Consistency: Stencils help maintain consistency in solder paste volume and shape across multiple PCBs, reducing the risk of defects and improving overall product quality.
- Efficiency: By using SMT stencils, the solder paste application process is automated, saving time and increasing production efficiency compared to manual methods.

Types of SMT Stencils
There are several types of SMT stencils available, each with its own characteristics and advantages. The choice of stencil type depends on factors such as the PCB Design, component size, and production requirements.
Laser-Cut Stencils
Laser-cut stencils are created using a high-precision laser to cut openings in a thin sheet of stainless steel. They offer several advantages:
- High accuracy and repeatability
- Suitable for fine-pitch components and intricate designs
- Durable and long-lasting
- Quick turnaround time
Electroformed Stencils
Electroformed stencils are made by electroplating nickel onto a photoresist-coated mandrel. The process results in a stencil with smooth, tapered aperture walls, which offers benefits such as:
- Excellent paste release
- Reduced risk of bridging and solder balling
- Suitable for ultra-fine pitch components
- Longer lifespan compared to laser-cut stencils
Additive Stencils
Additive stencils, also known as E-FAB or Nano-coated stencils, are created by selectively depositing a nano-coating onto a laser-cut stencil. The nano-coating forms the aperture walls, providing advantages like:
- Improved solder paste release
- Reduced clogging and cleaning requirements
- Enhanced durability and lifespan
- Suitable for complex designs and fine-pitch components

SMT Stencil Materials
The choice of material for an SMT stencil is crucial, as it affects the stencil’s performance, durability, and compatibility with the solder paste and cleaning processes.
Stainless Steel
Stainless steel is the most common material used for SMT stencils. It offers several advantages:
- Durability and long lifespan
- Compatibility with most solder pastes and cleaning agents
- Excellent dimensional stability
- Cost-effective
Nickel
Nickel stencils, particularly electroformed nickel stencils, are gaining popularity due to their unique properties:
- Smooth aperture walls for improved paste release
- High durability and resistance to wear
- Suitable for ultra-fine pitch applications
- Longer lifespan compared to stainless steel stencils
Polymers
Polymer stencils, such as those made from polyimide or other plastic materials, are sometimes used for specific applications:
- Suitable for low-volume prototyping
- Lower cost compared to metal stencils
- Flexibility allows for conformity to uneven surfaces
- Limited lifespan and lower durability compared to metal stencils

SMT Stencil Design Considerations
Designing an effective SMT stencil involves several key considerations to ensure optimal solder paste deposition and minimize defects.
Aperture Size and Shape
The size and shape of the stencil apertures directly impact the volume and shape of the solder paste deposit. Consider the following:
- Aperture width should be slightly larger than the pad width to accommodate paste shrinkage during reflow
- Aperture length should be equal to or slightly longer than the pad length
- Round or square apertures are most common, but other shapes may be used for specific components or to control paste volume
Stencil Thickness
The thickness of the stencil determines the volume of solder paste deposited. Factors to consider when selecting stencil thickness include:
- Component size and pitch
- Solder paste type and viscosity
- PCB pad size and shape
- Desired solder joint profile
Typical stencil thicknesses range from 0.10 mm to 0.20 mm (4 to 8 mils), with thinner stencils used for fine-pitch components and thicker stencils for larger components.
Aperture Wall Tapering
Tapering the walls of the stencil apertures can improve solder paste release and reduce the risk of clogging. The two main types of aperture wall tapering are:
- Positive Tapering: The aperture is wider at the top and narrower at the bottom, facilitating paste release.
- Negative Tapering: The aperture is narrower at the top and wider at the bottom, which can help control paste volume and prevent bridging.
The optimal tapering angle depends on factors such as the solder paste properties and the stencil material.
Fiducial Marks and Alignment Features
Fiducial marks and alignment features are essential for ensuring proper alignment between the stencil and the PCB. They help the solder paste inspection system and the Pick-and-Place machine locate the correct position of the PCB.
- Fiducial marks should be placed in at least three non-collinear locations on the stencil and PCB
- Alignment features, such as tooling holes or pins, can be used to physically align the stencil and PCB
Stencil Printing Process
The stencil printing process is a critical step in SMT assembly, as it directly affects the quality of the solder joints and the overall reliability of the final product.
Solder Paste Selection
Selecting the appropriate solder paste is essential for achieving optimal printing results. Consider the following factors:
- Alloy composition and melting temperature
- Particle size and distribution
- Flux type and activity level
- Viscosity and rheological properties
- Compatibility with the stencil material and PCB surface finish
Squeegee Selection
The squeegee plays a crucial role in the stencil printing process, as it is responsible for forcing the solder paste through the stencil apertures and onto the PCB pads. Key considerations for squeegee selection include:
- Material (metal or polymer)
- Hardness and durability
- Blade profile (straight or curved)
- Compatibility with the solder paste and stencil material
Print Parameters
Optimizing the print parameters is essential for achieving consistent and reliable solder paste deposits. The main parameters to consider are:
- Print speed
- Squeegee pressure
- Separation speed
- Print stroke length
- Snap-off distance
Proper adjustment of these parameters based on the specific stencil design, solder paste, and PCB characteristics can minimize defects such as insufficient or excessive solder paste, bridging, or poor adhesion.
Stencil Cleaning
Regular cleaning of the SMT stencil is necessary to maintain print quality and prevent defects caused by clogged apertures or solder paste buildup. The cleaning process typically involves:
- Removing excess solder paste from the stencil surface using a solvent or wipe
- Cleaning the apertures using a stencil cleaner or ultrasonic cleaning system
- Drying the stencil thoroughly before the next print cycle
The frequency of cleaning depends on factors such as the solder paste type, printing volume, and environmental conditions.
Solder Paste Inspection (SPI)
Solder Paste Inspection (SPI) is an automated process that assesses the quality of the solder paste deposits after stencil printing. SPI systems use 2D or 3D imaging technology to measure and analyze various parameters:
- Solder paste volume
- Height and area of the deposit
- Offset and alignment with the PCB pads
- Shape and consistency of the deposit
SPI helps identify potential issues early in the assembly process, allowing for timely corrections and reducing the risk of defects in the final product.
Best Practices for SMT Stencil Usage
To maximize the performance and longevity of SMT stencils, consider the following best practices:
- Proper Storage: Store stencils in a clean, dry environment, away from direct sunlight and extreme temperatures. Use stencil racks or storage containers to prevent damage and contamination.
- Handling: Handle stencils with care, using gloves to prevent skin oils and contaminants from affecting the stencil surface. Avoid bending or flexing the stencil, as this can cause damage to the apertures.
- Inspection: Regularly inspect the stencil for signs of wear, damage, or clogging. Use a microscope or magnifying glass to check the aperture walls and edges for any irregularities.
- Maintenance: Implement a regular cleaning and maintenance schedule to ensure optimal stencil performance. Follow the manufacturer’s recommendations for cleaning agents and methods.
- Process Control: Monitor the stencil printing process closely, using SPI and other quality control measures to identify and correct any issues promptly. Document process parameters and maintain a log of stencil usage and maintenance.
Troubleshooting Common SMT Stencil Issues
Despite best efforts, problems can still arise during the stencil printing process. Here are some common issues and their potential solutions:
Insufficient Solder Paste Deposition
- Increase stencil thickness
- Enlarge aperture size
- Increase squeegee pressure
- Reduce print speed
- Check for clogged apertures
Excessive Solder Paste Deposition
- Decrease stencil thickness
- Reduce aperture size
- Decrease squeegee pressure
- Increase print speed
- Check for damaged aperture walls
Bridging or Solder Balling
- Reduce solder paste volume
- Increase aperture wall tapering
- Optimize print parameters
- Improve stencil cleaning and maintenance
Poor Aperture Release
- Check for clogged or damaged apertures
- Increase aperture wall tapering
- Optimize solder paste and stencil material compatibility
- Improve stencil cleaning and maintenance
Frequently Asked Questions (FAQ)
- Q: How often should I replace my SMT stencil?
A: The lifespan of an SMT stencil depends on various factors, such as the stencil material, usage frequency, and maintenance practices. Generally, stainless steel stencils can last for 20,000 to 50,000 prints, while electroformed nickel stencils can last up to 100,000 prints or more. Regular inspection and maintenance can help extend the stencil’s lifespan. - Q: Can I use the same stencil for different solder paste types?
A: It is generally recommended to use a separate stencil for each solder paste type to avoid cross-contamination and compatibility issues. Different solder pastes may have varying rheological properties and flux activities, which can affect the printing performance and stencil life. - Q: How do I store my SMT stencils when not in use?
A: Store your SMT stencils in a clean, dry environment, away from direct sunlight and extreme temperatures. Use stencil racks or storage containers to prevent damage and contamination. Ensure that the stencils are thoroughly cleaned and dried before storage. - Q: What is the recommended cleaning frequency for SMT stencils?
A: The cleaning frequency depends on factors such as the solder paste type, printing volume, and environmental conditions. As a general guideline, clean the stencil every 4 to 8 hours of continuous printing, or whenever print quality begins to deteriorate. Always refer to the manufacturer’s recommendations for specific cleaning instructions. - Q: Can I reuse a damaged or worn-out SMT stencil?
A: It is not recommended to reuse a damaged or worn-out SMT stencil, as it can lead to poor print quality and defects in the assembled product. If the stencil shows signs of damage, such as bent or distorted apertures, excessive wear, or permanent clogging, it should be replaced with a new one.
Conclusion
SMT stencils are a critical component in the surface mount technology assembly process, enabling the precise and consistent deposition of solder paste onto PCB pads. By understanding the types, materials, design considerations, and best practices associated with SMT stencils, manufacturers can optimize their stencil printing process and improve the quality and reliability of their electronic products.
Regular inspection, maintenance, and process control are essential for maximizing stencil performance and longevity. By following the guidelines and recommendations outlined in this comprehensive guide, manufacturers can minimize defects, reduce costs, and enhance the overall efficiency of their SMT assembly process.
| Stencil Type | Advantages | Disadvantages |
|---|---|---|
| Laser-Cut | High accuracy, suitable for fine-pitch, durable | Limited aperture wall tapering |
| Electroformed | Excellent paste release, longer lifespan | Higher cost, longer lead time |
| Additive | Improved paste release, reduced clogging | Higher cost, limited availability |
| Stencil Material | Advantages | Disadvantages |
|---|---|---|
| Stainless Steel | Durable, cost-effective, widely available | Limited aperture wall tapering |
| Nickel | Smooth aperture walls, high durability | Higher cost, longer lead time |
| Polymer | Low cost, flexible, suitable for prototyping | Limited lifespan, lower durability |
As the electronics industry continues to evolve, with smaller, more complex components and higher density PCB designs, the importance of SMT stencils will only continue to grow. By staying informed about the latest developments in stencil technology and best practices, manufacturers can remain competitive and deliver high-quality, reliable products to their customers.