

Introduction to DIY Timers
A DIY timer, short for “Do-It-Yourself” timer, is a versatile and customizable device that allows users to control and automate various tasks based on specific time intervals. These timers can be constructed using readily available components and can be tailored to suit a wide range of applications, from home automation to industrial processes. In this article, we will explore the working principles behind DIY timers, their key components, and their diverse applications across different fields.
How DIY Timers Work
Basic Principle
The basic principle behind a DIY timer is to use a time-measuring device, such as a microcontroller or a clock module, to trigger an action or event after a pre-determined time interval. The timer keeps track of the elapsed time and, when the set time is reached, it sends a signal to activate or deactivate a connected device or system.
Key Components
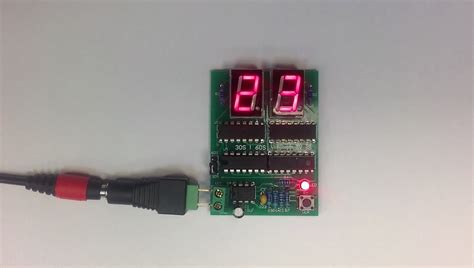
To construct a functional DIY timer, you will need the following key components:
- Microcontroller or Clock Module: This is the brain of the timer, responsible for keeping track of time and triggering events. Popular choices include Arduino boards, PIC microcontrollers, or Real-Time Clock (RTC) modules like the DS1307 or DS3231.
- Input Device: An input device, such as buttons, switches, or a keypad, allows users to set the desired time interval and control the timer’s operation.
- Output Device: The output device is the component that is activated or deactivated by the timer. This can be a relay module to control high-power devices, an LED for visual indication, or a buzzer for audible alerts.
- Power Source: DIY timers require a power source to operate, which can be a battery, a power adapter, or a connection to the mains supply.
- Enclosure: An enclosure or case is necessary to protect the timer’s components and provide a user-friendly interface.
Timer Configuration
The timer’s configuration depends on the specific requirements of the application. The following factors should be considered:
- Time Interval: The desired time interval can range from seconds to hours or even days, depending on the application. The microcontroller or clock module should be programmed accordingly.
- Trigger Mode: DIY timers can be configured to operate in various trigger modes, such as:
- One-shot: The timer activates the output device once after the set time interval.
- Continuous: The timer continuously activates and deactivates the output device at regular intervals.
- Countdown: The timer starts from a set time and counts down to zero, at which point it triggers the output device.
- User Interface: The user interface can be as simple as a single button or as complex as a graphical display with multiple input options. The choice depends on the level of control and flexibility required.

Applications of DIY Timers
DIY timers find applications in a wide range of fields, from home automation to industrial process control. Some of the most common applications include:
Home Automation
In home automation, DIY timers can be used to control various devices and systems, such as:
- Lighting control: Timers can be set to turn lights on and off at specific times, creating a lived-in look even when the house is empty.
- Irrigation systems: Timers can automate watering schedules for gardens and lawns, ensuring optimal water usage.
- Appliance control: Timers can be used to control appliances like coffee makers, slow cookers, or air conditioners, allowing them to operate at pre-determined times.
Industrial Process Control
DIY timers play a crucial role in industrial process control, helping to automate and optimize various processes:
- Batch processing: Timers can control the duration of each stage in a batch process, ensuring consistent results and efficient resource utilization.
- Conveyor systems: Timers can coordinate the movement of items on a conveyor belt, regulating the speed and spacing between products.
- Valve control: Timers can be used to open and close valves at specific intervals, controlling the flow of liquids or gases in a process.
Scientific Experiments
In scientific experiments, DIY timers can help automate data collection and control experimental parameters:
- Data logging: Timers can trigger sensors to collect data at regular intervals, allowing for continuous monitoring of experimental conditions.
- Environmental control: Timers can regulate temperature, humidity, or light cycles in experimental setups, ensuring consistent conditions for accurate results.
Photography and Videography
DIY timers find applications in photography and videography, enabling creative techniques and automating tasks:
- Time-lapse photography: Timers can trigger a camera to capture images at set intervals, creating stunning time-lapse sequences.
- Long exposure shots: Timers can control the duration of long exposure shots, allowing for creative effects like light trails or smooth water flow.
- Video recording: Timers can start and stop video recording at specific times, useful for capturing events or monitoring purposes.

Building a DIY Timer
Building a DIY timer requires some basic electronics knowledge and skills. Here’s a step-by-step guide to help you get started:
Step 1: Choose Your Components
Select the appropriate microcontroller or clock module, input and output devices, power source, and enclosure based on your application requirements.
Step 2: Design the Circuit
Create a circuit diagram that connects all the components according to their specifications. Ensure proper power supply and signal connections.
Step 3: Assemble the Hardware
Assemble the components on a breadboard or a printed circuit board (PCB) according to the circuit diagram. Double-check all connections to avoid errors.
Step 4: Program the Microcontroller
Write the necessary code to configure the microcontroller or clock module for the desired time interval and trigger mode. Test the code using a development environment before uploading it to the device.
Step 5: Test and Debug
Power up the timer and test its functionality. Use the input devices to set the time interval and observe the output device’s response. Debug any issues that arise and make necessary adjustments.
Step 6: Enclosure and Finishing
Once the timer is working as intended, design and fabricate an appropriate enclosure to house the components. Consider factors like ease of use, durability, and aesthetics.

Troubleshooting Common Issues
When building and using DIY timers, you may encounter some common issues. Here are a few troubleshooting tips:
- Inaccurate timing: If the timer is not keeping accurate time, check the clock source’s accuracy and ensure proper configuration of the microcontroller or clock module.
- Unresponsive input devices: If the input devices are not responding, verify their connections and ensure they are properly configured in the code.
- Output device not triggering: If the output device is not activating as expected, check its connections and ensure the microcontroller is sending the correct signal. Verify that the output device is compatible with the timer’s specifications.
- Power issues: If the timer is not powering on or is behaving erratically, check the power source and ensure it is providing the required voltage and current. Verify that all components are receiving proper power supply.
FAQ
1. Can I use a DIY timer for commercial applications?
Yes, DIY timers can be used for commercial applications, provided they are designed and built to meet the specific requirements and safety standards of the intended use case.
2. How accurate are DIY timers?
The accuracy of a DIY timer depends on the clock source used and the microcontroller’s configuration. Using a high-precision real-time clock (RTC) module and proper calibration can achieve accuracies in the range of seconds per day.
3. Can I control multiple devices with a single DIY timer?
Yes, a single DIY timer can control multiple devices by using multiple output channels or by incorporating a relay module that can switch multiple devices simultaneously.
4. Are DIY timers energy-efficient?
The energy efficiency of a DIY timer depends on its design and the components used. Using low-power microcontrollers and efficient power management techniques can help minimize energy consumption.
5. How long can a DIY timer operate continuously?
The continuous operation time of a DIY timer depends on its power source and the energy consumption of its components. With appropriate power management and a reliable power source, a DIY timer can operate continuously for extended periods, ranging from days to months or even years.
Conclusion
DIY timers are powerful tools that enable users to automate and control various tasks and processes based on specific time intervals. By understanding the working principles, key components, and applications of DIY timers, you can harness their potential to solve a wide range of problems across different fields.
Building a DIY timer requires careful planning, component selection, and attention to detail during assembly and programming. With the right approach and troubleshooting skills, you can create a reliable and efficient timer that meets your specific requirements.
As you explore the world of DIY timers, keep in mind the endless possibilities they offer. From home automation to industrial process control, scientific experiments to creative photography, DIY timers can help you streamline tasks, optimize resources, and unlock new opportunities for innovation and efficiency.