

Introduction
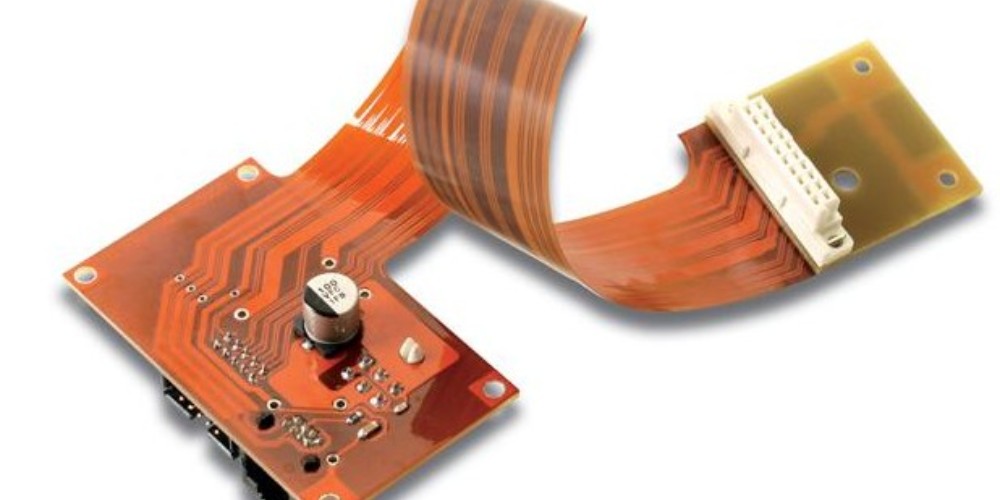
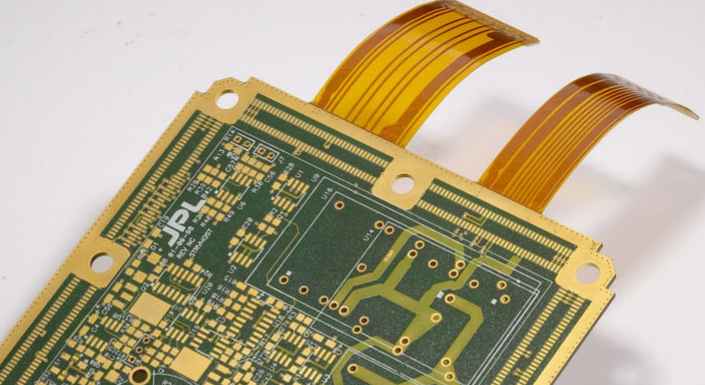
Rigid-flex printed circuit boards (PCBs) combine rigid and flexible circuitry into a single interconnected package. This allows the PCB to bend and flex in certain areas while maintaining rigidity in others. Rigid-flex PCBs are ideal for products where space is limited or flexing is required, like wearables, medical devices, or foldable consumer electronics.
However, rigid-flex PCBs come at a higher cost compared to rigid PCBs. There are additional fabrication steps, more complex assembly requirements, and more expensive base materials involved. When estimating costs for your next rigid-flex design, you need to factor in a variety of considerations beyond just board size.
This guide will provide a detailed breakdown of the key cost drivers when budgeting for your rigid-flex PCB project. We’ll look at:
- Base material costs
- Layer count impact
- Flex/rigid ratio and complexity
- Special processing requirements
- Small batch prototypes vs. high volume production
- And more…
Understanding these variables will help you plan your rigid-flex budget accurately and reduce bill of materials (BOM) creep.
Rigid Flex PCB Base Material Costs
The raw PCB laminate material forms a significant portion of the total cost of a rigid-flex board. Let’s look at the two main material options:
Polyimide Flex Materials
Polyimide films like Kapton® are most commonly used for the flexible sections. Polyimide offers:
- Excellent flex life and bend radius
- Withstands repeated flexing without cracking
- High temperature resistance
- Good chemical resistance
However, polyimide comes at a premium price over traditional FR-4 rigid materials. Expect to pay $300-500/square meter for polyimide film. Thinner material is near the lower end of this spectrum.
Rigid Board Materials
The rigid portions of the PCB use traditional rigid laminates. FR-4 glass reinforced epoxy is the most popular and cost-effective option. Pricing ranges from $5-12/square foot depending on:
- Layer count
- Thickness (common options: 0.4mm, 0.8mm, 1.6mm, 2.0mm+)
- TG rating – standard TG130-TG150 or high Tg 170-Tg190
- Halogen free or other special formulations
Higher performance substrates like Isola, Arlon, Rogers, Taconic, etc. cost 2X-10X standard FR-4 pricing but offer superior electrical and thermal properties.
Adhesive Layers
Bonding film adhesives are used to attach the rigid and flexible materials together. Common options:
- Acrylic adhesive – $0.10-0.40/square inch
- Epoxy adhesive – $0.15-0.60/square inch
Adhesives must match the temperature ratings of the other materials to avoid failures during lamination.
Layer Count Impact on Rigid Flex PCB Cost
As with any PCB, moving from a 2 layer board to 4 layers, 6 layers, etc. substantially increases cost. Some key considerations for rigid-flex layer counts:
- Layer count multiples – Rigid-flex is usually built in multiples of 2 layers at a time. So 4 layers, 6 layers, 8 layers, etc. This allows for signal return paths and power/ground planes.
- Separate layer counts – Rigid and flex sections can have different numbers of layers. For example, rigid sections might be 4 layers, while flex is just 2 layers.
- Blind and buried vias – To transition between different layer counts in rigid and flex areas, blind and buried vias are used. These specialty via types cost more than standard through hole vias.
- Thin dielectrics – To reduce rigid section thickness, very thin dielectrics (~25-50um) can be used versus standard 105um in low layer count boards. Thin dielectrics increase cost.
Here is an example layer count cost estimate for a simple 4″ x 6″ rigid-flex board:
| Layer Count | Estimated Cost |
|---|---|
| 2 Layer | $1,000 |
| 4 Layer | $1,600 |
| 6 Layer | $2,500 |
| 8 Layer | $3,800 |
As you can see, cost scales up rapidly with layer count. Factor this into your budget carefully when determining design requirements.
Rigid to Flex Ratio Impact
The ratio of rigid versus flex PCB area also affects cost. Some key considerations:
- More flex = more cost – The flexible polyimide material is more expensive per area than rigid FR-4. A board with 50% flex area will cost more than one with 20% flex area.
- Small rigid sections – Very small rigid “islands” surrounded by large flex areas increase fabrication difficulty. This can raise cost. Try to design rigid sections above ~3cm x 3cm minimum.
- Flex bending – The more the flex area needs to bend, the higher the cost. Simple 90 degree folds are cheaper than complex shapes with tight bends.
- Flex/rigid transitions – Where the flex and rigid sections meet also adds cost. Minimize the number of transitions where possible.
As a rough estimate, a board with 80% rigid area and 20% flex area will be ~20-30% more expensive than an all rigid PCB of the same size and layer count.
Special Processing Requirements
Rigid-flex PCBs often require additional special processing steps beyond standard PCB fab. These processes will increase cost:
Coverlay Application
To protect conductors on the flexible area, a thin insulating coverlay material may be laminated onto the flex sections. Common coverlay materials include Liquid Photo Imageable (LPI) solder mask, acrylic, and polyimide.
Typical coverlay cost impact:
- $150-300 NRE for processing setup
- $0.12-0.40 / square inch of coverlay material cost
Selective Stiffening
For rigid sections that require flexing, selective stiffening can be used. Small areas are stiffened using additional laminate layers, while other areas remain flexible.
This allows rigid sections to flex in certain directions. Selective stiffening incurs ~5-15% additional cost for the specialized laminate fabrication.
Controlled Impedance Flex
If controlled impedance flex traces are required, costs will increase $300-500+ for impedance testing and special handling. Controlled impedance on the rigid portion only adds ~$100 NRE.
Shielding
EMI shielding in the flex area using sputtered coatings or other shielding materials will add 30-50% to the square inch cost. Shielding rigid areas only adds 10-15%.
Flex Component Assembly
Assembling components onto the flexible portion requires specialized flex PCB assembly equipment. This can cost 2-3X more per component than standard SMT assembly. Carefully evaluate if flex assembly is necessary.
Prototype Small Batches vs. High Volume Production
As with any PCB, rigid-flex costs are much higher in low volume prototyping versus high volume production. Here is a comparison:
| Small Volume | High Volume | |
|---|---|---|
| Volume Range | 10-50 boards | 500+ boards |
| Board Cost | $4,000 | $400 |
| NRE Cost | $1,500 | $2,000 |
| Total Cost | $5,500 | $2,400 |
Note that NRE setup costs get amortized over more boards in production. Carefully evaluate how many boards you need before deciding on final volume. Consider starting with a prototype run first.
Other Factors Influencing Rigid Flex PCB Cost
Beyond the major factors above, here are some other considerations that can affect rigid-flex pricing:
- Board size and shape complexity – Large and complex board outlines will cost more. Simpler shapes save on material.
- Flex strain relief – Adding stiffeners or other strain relief features to high flex areas increases cost but improves reliability.
- Small holes – Minimizing hole sizes, microvias, etc. saves cost over larger holes.
- Tolerances – Tighter trace spacing and line width control adds cost. Consider relaxing tolerances where possible.
- Lead times – Normal lead times are 4-6 weeks, with rush 2-3 week builds costing significantly more.
- Design for manufacturing (DFM) – Following DFM principles saves on potential fab issues. Work with your PCB partner for DFM review.
Rigid Flex PCB Cost Per Square Inch Approximation
Based on the factors above, here is a table with approximate bare board pricing per square inch for small quantity prototype rigid flex PCB orders:
| Layer Count | 2 Layer | 4 Layer | 6 Layer | 8 Layer |
|---|---|---|---|---|
| Rigid Area | $10-15 | $15-22 | $22-35 | $35-50 |
| Flex Area | $20-30 | $30-45 | $45-65 | $65-90 |
Keep in mind that this pricing is just for the bare PCBs. It does not include component costs, assembly, stencils, testing, etc. Those will need to be added to determine the full board cost.
As you start reaching higher volumes in the thousands of boards, you can expect these per square inch costs to drop dramatically, anywhere from 5X-10X lower.
Rigid Flex PCB Cost Reduction Tips
Here are some tips to help reduce overall rigid-flex PCB costs for your projects:
- Standardize on 2-4 layer count if possible. Avoid high layer counts unless absolutely needed.
- Minimize special processing steps like selective stiffening, complex shielding, and flex component assembly.
- Design panelization to maximize board count per panel and reduce material waste.
- Specify appropriate tolerances – avoid overspecifying tolerances.
- Review design/DFM with your PCB manufacturer for feedback.
- Build prototypes first in small batches before high volume commit.
- Leverage NRE across multiple PCB designs to optimize cost per board.
Conclusion
Rigid-flex PCBs provide unique advantages, but also come at a premium price versus standard rigid boards. Understanding the key variables that drive cost is crucial when estimating a budget. Focus on optimizing layer count requirements, flexible vs rigid area ratio, minimizing special processing steps, and moving to higher volumes to reduce costs. With careful planning and design considerations, rigid-flex can be a cost-effective solution for products requiring a blend of flexible and rigid functionality.
FAQ
Here are answers to some frequently asked questions about rigid flex PCB costs:
Q: Does board thickness and size impact rigid flex PCB cost?
A: Yes, thicker boards with more layers drive up material costs. Larger board sizes also increase cost due to greater material usage. However, the layer count and flex vs. rigid ratio usually have a bigger impact on price.
Q: Are there ways to reduce flex PCB material costs in my design?
A: Using selective stiffening to only flex where needed, minimizing complex bends, and consolidating flex layers can help reduce material costs. A void in the rigid section can also eliminate flex material cost where flexing is not needed.
Q: What factors should I consider when choosing layer count in my rigid flex design?
A: Consider factors like number of signals, ground connections, stripline routing needs, component clearance, and mechanical layer symmetry. Use the lowest layer count that satisfies your electrical, thermal, and mechanical requirements.
Q: How can I estimate lead time and expedite time for rigid flex PCB orders?
A: Lead times average 4-6 weeks, sometimes longer for complex designs requiring engineering review. Expedited turn times can be 2-3 weeks typically but cost 50-100% more. Discuss options with your PCB manufacturer.
Q: Will using HDI technology reduce rigid flex PCB costs?
A: HDI can sometimes reduce external layer counts. However, blind/buried vias and thin core dielectrics offset the savings. Evaluate cost tradeoffs carefully before implementing HDI.