

Introduction
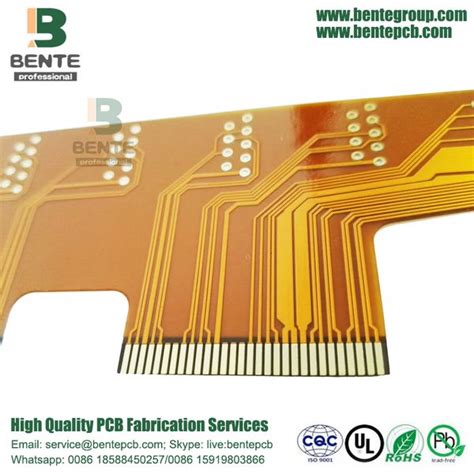
Flexible printed circuit boards (Flex PCBs) have gained immense popularity in recent years due to their versatility and ability to conform to various shapes and sizes. These PCBs are widely used in applications that require flexibility, such as wearable devices, medical equipment, and aerospace systems. However, soldering surface mount devices (SMDs) on flex PCBs can be challenging, as it requires special techniques and considerations to ensure a reliable and durable connection.
In this article, we will discuss five crucial aspects that you need to pay attention to when soldering SMDs on flex PCBs. By understanding and implementing these techniques, you can achieve high-quality solder joints and minimize the risk of defects.
1. Choosing the Right Solder Paste
Selecting the appropriate solder paste is crucial for achieving reliable solder joints on flex PCBs. When working with SMDs, it is recommended to use a no-clean solder paste with a fine particle size. The smaller particle size allows for better print definition and reduces the risk of bridging between pads.
Consider the following factors when choosing a solder paste for Flex PCB Soldering:
- Alloy composition: Select a solder paste with an alloy composition that is compatible with the SMD components and the flex PCB material. Common alloys include SAC305 (Sn96.5Ag3.0Cu0.5) and SN100C (Sn99.3Cu0.7).
- Flux type: Use a no-clean flux to minimize residue and eliminate the need for post-soldering cleaning. No-clean fluxes also reduce the risk of damaging the flexible substrate during cleaning.
- Viscosity: Choose a solder paste with the appropriate viscosity for your application. A thicker paste may be required for larger components or pads, while a thinner paste is suitable for smaller components and fine-pitch applications.
| Solder Paste Property | Recommendation for Flex PCB Soldering |
|---|---|
| Alloy Composition | SAC305 or SN100C |
| Flux Type | No-clean |
| Particle Size | Type 3 or Type 4 |
| Viscosity | Depends on component size and pitch |

2. Proper Stencil Design and Printing
Accurate solder paste deposition is essential for achieving reliable solder joints on flex PCBs. Proper stencil design and printing techniques ensure that the right amount of solder paste is deposited on the pads, minimizing the risk of defects such as insufficient or excessive solder.
Consider the following factors when designing and printing stencils for flex PCB soldering:
- Stencil thickness: Use a stencil thickness that is appropriate for the component size and pitch. A typical stencil thickness for SMD soldering on flex PCBs ranges from 0.1 mm to 0.15 mm (4 to 6 mils).
- Aperture size and shape: Design the stencil apertures to match the pad size and shape on the flex PCB. Slightly smaller apertures may be required to account for the flexibility of the substrate and to prevent solder paste bleeding.
- Stencil material: Use a laser-cut stainless steel stencil for optimal print definition and durability. Nickel-plated stencils can also be used to improve paste release and reduce sticking.
- Print parameters: Optimize the print parameters, such as squeegee pressure, speed, and separation distance, to achieve consistent solder paste deposition. Conduct print tests and inspect the results to fine-tune the parameters.

3. Controlled Reflow Profile
A controlled reflow profile is crucial for achieving reliable solder joints on flex PCBs. The reflow profile should be tailored to the specific requirements of the solder paste, SMD components, and flex PCB material. An improper reflow profile can lead to defects such as incomplete melting, cold joints, or delamination of the flexible substrate.
Consider the following factors when developing a reflow profile for flex PCB soldering:
- Peak temperature: Ensure that the peak temperature is high enough to fully melt the solder paste and form a reliable joint, but not so high that it damages the components or the flex PCB material. Typical peak temperatures range from 235°C to 245°C for SAC305 and SN100C solder pastes.
- Time above liquidus (TAL): Maintain the temperature above the liquidus point of the solder paste for a sufficient duration to allow for complete melting and wetting of the components and pads. A TAL of 60 to 90 seconds is commonly used for SMD soldering on flex PCBs.
- Ramp rates: Control the heating and cooling ramp rates to minimize thermal stress on the components and the flex PCB. Typical heating ramp rates range from 1°C/s to 3°C/s, while cooling ramp rates should be less than 4°C/s to prevent excessive warpage.
- Preheat and soak zones: Include appropriate preheat and soak zones in the reflow profile to activate the flux, remove solvents, and minimize thermal shock. Preheat temperatures typically range from 150°C to 180°C, with a soak duration of 60 to 120 seconds.
| Reflow Profile Parameter | Recommendation for Flex PCB Soldering |
|---|---|
| Peak Temperature | 235°C to 245°C |
| Time Above Liquidus (TAL) | 60 to 90 seconds |
| Heating Ramp Rate | 1°C/s to 3°C/s |
| Cooling Ramp Rate | < 4°C/s |
| Preheat Temperature | 150°C to 180°C |
| Soak Duration | 60 to 120 seconds |

4. Proper Support and Fixturing
Flex PCBs are inherently flexible, which can pose challenges during the soldering process. Proper support and fixturing are essential to ensure that the flex PCB remains flat and stable during solder paste printing, component placement, and reflow soldering. Inadequate support can lead to misalignment, warpage, or damage to the flex PCB and components.
Consider the following factors when designing support and fixturing for flex PCB soldering:
- Rigid backing: Use a rigid backing material, such as a thin sheet of aluminum or FR-4, to support the flex PCB during the soldering process. The backing material should be flat, smooth, and slightly larger than the flex PCB to provide adequate support.
- Temporary adhesives: Use temporary adhesives, such as double-sided tape or pressure-sensitive adhesives, to secure the flex PCB to the rigid backing. The adhesive should withstand the reflow temperature and be easily removable after soldering.
- Edge support: Provide support along the edges of the flex PCB to prevent lifting or curling during reflow. This can be achieved using clamps, weights, or a custom-designed fixture that conforms to the shape of the flex PCB.
- Component placement: Ensure that the components are securely placed on the flex PCB prior to reflow soldering. Use a pick-and-place machine or manual placement techniques, such as tweezers or vacuum pens, to position the components accurately.
5. Inspection and Quality Control
Post-soldering inspection and quality control are critical for identifying and addressing any defects or issues in the soldered flex PCB assembly. Thorough inspection helps ensure that the assembly meets the required quality standards and performs reliably in the intended application.
Consider the following factors when implementing inspection and quality control for flex PCB soldering:
- Visual inspection: Conduct a visual inspection of the soldered assembly using a magnifying lens or microscope. Check for defects such as bridging, insufficient solder, solder balls, or component misalignment. Use industry standards, such as IPC-A-610, as a guide for acceptance criteria.
- X-ray inspection: Utilize X-ray inspection to detect hidden defects, such as voids, cracks, or incorrect component placement, in ball grid array (BGA) or quad-flat no-lead (QFN) packages. X-ray inspection provides a non-destructive means of evaluating the quality of the solder joints.
- Electrical testing: Perform electrical testing to verify the functionality and performance of the soldered assembly. This may include continuity testing, insulation resistance testing, or in-circuit testing, depending on the complexity and requirements of the assembly.
- Rework and repair: Establish procedures for reworking or repairing any defects identified during the inspection process. Use appropriate tools and techniques, such as a hot air rework station or a soldering iron with a fine tip, to remove and replace defective components or repair solder joints.
Frequently Asked Questions (FAQ)
- What is the recommended solder paste for flex PCB soldering?
- For flex PCB soldering, it is recommended to use a no-clean solder paste with a fine particle size, such as Type 3 or Type 4. Common alloy compositions include SAC305 (Sn96.5Ag3.0Cu0.5) and SN100C (Sn99.3Cu0.7).
- How thick should the stencil be for SMD soldering on flex PCBs?
- A typical stencil thickness for SMD soldering on flex PCBs ranges from 0.1 mm to 0.15 mm (4 to 6 mils). The exact thickness depends on the component size and pitch.
- What is the recommended peak temperature for reflow soldering on flex PCBs?
- The recommended peak temperature for reflow soldering on flex PCBs ranges from 235°C to 245°C for SAC305 and SN100C solder pastes. The exact temperature depends on the specific solder paste and components used.
- How can I support the flex PCB during the soldering process?
- To support the flex PCB during soldering, use a rigid backing material, such as a thin sheet of aluminum or FR-4, and secure the flex PCB to the backing using temporary adhesives. Provide additional support along the edges of the flex PCB to prevent lifting or curling.
- What inspection methods are used for quality control of soldered flex PCB assemblies?
- Visual inspection using magnification, X-ray inspection for hidden defects, and electrical testing are commonly used methods for quality control of soldered flex PCB assemblies. Industry standards, such as IPC-A-610, provide guidance on acceptance criteria for soldered assemblies.
Conclusion
Soldering SMDs on flex PCBs requires careful attention to various factors to ensure reliable and high-quality solder joints. By selecting the appropriate solder paste, designing proper stencils, controlling the reflow profile, providing adequate support and fixturing, and implementing thorough inspection and quality control, you can successfully solder SMDs on flex PCBs and achieve optimal performance in your applications.
Remember to consider the specific requirements of your project, such as the component sizes, pitches, and materials, when developing your soldering process. Continuously monitor and optimize your process to improve efficiency, reduce defects, and enhance the overall quality of your flex PCB assemblies.